• Published on

    sustainable vibes

    Image description
    Happy belated Earth Day, fellow Earthlings! Zero-Waste Living is probably a term you have heard before. To many this term seems like a daunting, time-consuming and very expensive task to take on. This isn’t necessarily true. Sometimes making better consumer choices can in turn save you money, while simultaneously helping the environment. I am not writing this post to talk you into going full blown zero-waste. I want you to become aware of your purchases and better ways we can live being more sustainable

    As a designer, I am always thinking about product and how they affect the space, the person in the space and the environment. Sustainable design is very important to me. I have decided that it was time to bring that sustainability into my own home. It has been my goal to be a more conscious consumer for quite some time, however I have not made the commitment to do so. I am making this Earth Day the marking of my commitment to be a better person to the Earth in which I live. My goal is to cut out unnecessary waste that is harmful to the Earth. I know it isn’t realistic to be zero-waste in the blink of an eye, but I do want to be more conscious about what I am buying. I am hoping while doing this, I will become accustomed to making more sustainable decisions in my day-to-day life.
    Here are my top Sustainable buys in honor of Earth Day
    1.       Bamboo Toothbrush
    A toothbrush product that is used daily and is recommended to be replaced every 3 months. Purchasing bamboo toothbrushes over plastic toothbrushes is a great alternative. Bamboo is biodegradable and breaks down much easier than plastics. This bamboo tooth brush has soft, charcoal bristles to help whiten your teeth as well!
    2.       Reusable Produce Bags
    I typically try to avoid the plastic produce bags when grocery shopping. I find that they are not needed for most fresh produce (i.e. avocados, apples, zucchinis, bananas etc). You can place these items directly into your cart and skip the plastic! Items like brussel sprouts, green beans, spinach produce bags are needed. This is why I wanted to buy reusable produce bags as the plastic bags typically just get thrown out right away.. What a waste!

    ​
    3.       Beeswax wrap – I am a sucker for plastic wrap and tinfoil. I use this stuff all of the time as it is all too easy and convenient. However, it is not convenient that it isn’t biodegradable. I am opting to try out beeswax wrap. Beeswax wrap is much more eco-friendly than the other options so it is a step in the right direction! This is a great buy because it is a natural substance so it is biodegradable and it is reusable so you can get more than just a single use out of it. Which I feel can save you money in the long run. 
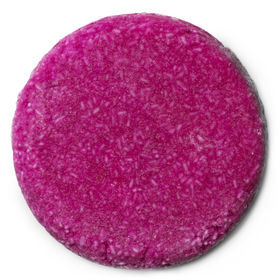
    4.       Shampoo Bar – I have been using shampoo bars from Lush Cosmetics. They are truly awesome! It is such a great alternative to your standard shampoos. Most shampoos have tons of chemicals in them that in many countries are banned. With these shampoo bars, there are fewer chemicals. Shampoo bars are great for traveling and reduce plastic waste as they are typically sold naked, without the plastic packaging. I store mine in a metal tin from Lush Cosmetics.
    You have to start somewhere in order to become a more eco-friendly consumer. I don't expect myself to turn completely zero waste in a day. These four products are a great starting point. With these products you aren't eliminating anything from your lives or changing your lifestyle. I feel that with these products you aren't losing the convenience that we as humans tend to gravitate towards. These still are very convenient products. In fact, some of these products to be much better than the alternatives I used to use. 

    I hope this inspires you all to start thinking more sustainably!

    Happy Earth Day!!
  • Published on

    refresh & organize your home

    Now that we are getting settled into the New Year, it is time to refresh and re-energize our homes.  De-cluttering is crucial for our well-being.  Life can be chaotic and messy, but our home is one place where it shouldn't be.  A home should be a place to relax and re-energize -- a sanctuary.  By taking the time to de-clutter and organize, we are freeing up time & space in our lives for more important things. 

    That is exactly why I want to start 2018 off getting organized!  Join me by following these simple steps to a clutter-free home. 
    1. Focus on one thing at a time. Dedicate one week to a room or area in your home. This will allow you to really dive in and focus on the main problem areas in your home. We want to get down to the nitty gritty and make sure that we get super organized. If you try and do everything at once or in one day, this leaves you bored or overwhelmed halfway through and more likely to call it a quits before finishing. Make sure you are carving out enough time each day/week to finish what you have started. Here is my breakdown over the next month

    Week 1 > Living Room
    Week 2 > Bedroom
    Week 3 > Bathroom & Hallway closets
    ​Week 4 > Kitchen
    2. Does this add value to my life? This is the question you need to ask yourself as you go through each item. If the object adds value and makes you happy, keep it. I know this is much easier said than done. You need to be honest with yourself. Not everything you have still adds true value to your life today. You cannot justify everything. 

    A quick list of items that are no longer adding value:
    -Old clothes - No I will not wear these clothes from highschool that are still sitting in my closet.
    -Old Make-up: Gross! If it is past its recommended life, let it go. Same goes for cosmetics.
    -Items you claim you will use in the future. If you haven't used it in months or years, it is the future and guess what... you don't need it!
    3. Separate everything into categories. As you are sorting through each item, create keep, donate, and toss(recycle) piles. After sifting through everything in the area you are working on, go back through your keep pile a second or third time. Once you get into the groove of letting things go, it becomes a lot easier! You may be likely to let some more things go that you "thought" were adding value after coming back to it. Sometimes its nice to do this after a break so that you have a fresh mind when going through your items one more time.

    TIP: Recycle and donate what you can. We want to keep as much of the stuff we are letting go out of the trash! Many retailers have a program for recycling clothes that are no longer useful. I.e. they have holes, stains or rips in them. This keeps textiles from going to the landfill and they are able to be reused and created into something new!
    4. Find a proper home for everything. Pay attention to where your things tend to fall. You want to create a home that is convenient for its use, but makes the most sense. For example, if you tend to leave shoes by your front door rather than putting them away in your bedroom closet, that means that your bedroom closet probably isn't the best home for your shoes. Find a place near your front door that works. Put a shoe rack in your entryway closet for shoes you wear most often. 

    Make sure everything gets its proper home. Stay away from junk drawers or bins that collect random items. This one is my biggest weakness. I have so many bins and baskets that are just full of random stuff I do not know what to do with. Half the time I forget I have any of the items in those bins or I can never remember where to find them. There is a better way to organize these items. If it is necessary to have bins throughout your home, make sure like items are placed in the same bins. Do not let them get to the point of overflowing and looking like a pile of junk.

    TIP: Utilize wall space. Having lived in a tiny studio apartment for 2 years, I leaned quickly how essential this is. Vertical space is your best friend. It allows you to keep things in the area where they are useful without getting in the way. I recently put up barn wood shelves in my bathroom to eliminate the clutter that ends up all over my super tiny counter.
    5. Break your habits. Theres a reason why your home continues to get cluttered and messy.  Take some time to reflect on why your home continues to become unorganized.  This means paying more attention to the things you buy and bring into your home. We are all guilty of impulse buys from time to time, but is important to stop buying things that we do not need. It may seem like a good idea at the time, but a month down the line it probably will end up in one of your junk bins and you will forget it ever existed. Be more conscious about the purchases you make! One bad habit I have is throwing things wherever I am. My dining table collects papers. I always through my bags, coat and shoes down immediately when I walk in my door. I need to work on getting in a habit to putting things in their designated home. 
    Remember that organizing is an ongoing process! The best way to achieve maximum organization is to span it out over time and to continue doing it even when you have completed the big clean sweep. Now that you have a home that is refreshed, you can enjoy the serenity vibes of a chaos free home!

    Organizing should not be depressing or stressful. This process should be a relief as you purge things that no longer serve a purpose in your life. What are some useful tips you use to de-clutter your home? How do you organize those pesky junk drawers? I'd love to hear from you as I embark on my organization journey over the next month.

  • Published on

    How to: reclaimed barn wood shelves

    Barn wood shelves are a fun way to add some character to your walls and create a place for storage. These shelves were fairly easy to make (Mostly thanks to my dad for doing all of the manual labor)
    • Gather barn wood. My parents live in an 150 year old farm house with the original barn still on the lot. They have tons of barn wood for me to use. If you do not have access to a barn, check out your local salvage shops. Here in Milwaukee we have the Habitat for Humanity Restore or WasteCap. These are great resources to find old original barn wood. 
    • Cut the barn wood to the desired length. These boards are 6"D and were cut to be 22"W.
    • Clean and Finish wood. It is a good idea to clean the wood so that you do not bring any dirt or bugs inside your home. I cleaned the boards with soap, water, and a bristle brush. Let dry. After wood is dry, seal the wood with Minwax Polycrilic Clear Spray. This is a super quick drying clear spray that makes it convenient and easy to use while keeping the look of the original barn wood intact. I found this on Amazon.
    • Next step is to make the brackets. If you do not have the tools to bend and cut metal, it is much easier to buy L brackets. Here I bought strips of cold-rolled steel and had my dad cut the strips, bent them to the desired size, and drill holes (for mounting).
    • Rust brackets. This step is personal preference. I wanted the brackets to have a rustic look. I took muriatic acid and painted it onto the brackets. Be careful with the acid not to get it on yourself or anything else. I set this in a bucket and let sit outside overnight.
    • Hang brackets on wall. I measured from the ceiling down and made sure the brackets were level and all lined up. Typically I would use screws to hold these shelves up, however, I live in a rental and did not want to put a ton of holes in my bathroom wall. Instead I used Command strips to hold the brackets. These are a renters miracle! They are easy to use, are reliable and easy to remove. Command strips can hold up to 10lb each so you have to make sure that you do not exceed this weight. Be sure to consider the weight of the brackets and the shelves if you go this route.

    • Set shelves on brackets. 
    Picture
    • Decorate the shelves with your favorite items!
  • Published on

    3 Design rules to live by

    Every designer has a different set of rules that they swear by. Now these rules are not life our death, but I find them extremely helpful in designing a fun and beautiful home. 

    #1 SURROUND YOURSELF WITH PIECES YOU LOVE

    This rule is the most important and may seem like a given, but we all have purchased things we have later regretted. Its called impulsive shopping and I know you have been there too. Impulsive buying might be okay when shopping for clothes or other inexpensive items; you do not want to do this when designing your home. Let's be honest, creating a beautiful home can be super expensive. Just like Rome wasn't built in a day, your home shouldn't be either. You may feel anxious to finish designing your space, but I promise you you will love your space more if you wait until you come across the perfect pieces. You want to find things that make you happy and excited. Most people turn to Pinterest or other people and mimic their designs and ideas. This is fine for inspiration, but you want to make sure you tweak them to fit your own personal style. You are the one that has to live in the space so why not create unique vibes that you genuinely enjoy! I tend to be very picky when it comes to decorating my apartment. This is why I am nowhere near finished designing it. My absolute favorite pieces in my home are my coffee table & copper lamp. I kid you not, I looked at this coffee table for 2 years before finally pulling the trigger. Talk about thinking it over… This piece was SO worth the wait! Isn’t it beautiful?
    #2 AVOID CLUTTER

    Having too much stuff can be overwhelming and chaotic. I don't know about you, but clutter makes me anxious. I suffer from it! I try on a daily basis to declutter my apartment and slowly but surely it is working. I have a hard time parting with things  I no longer need. Having to much stuff makes your place seem messy even when it isn't. Finding a perfect place for your decor, knick-knacks etc. can help eliminate the feeling of clutter. I like to use bins and baskets to hide some of the things I do not need to stare at or use everyday.
    Image description
    #3 DON'T BE AFRAID TO MIX AND MATCH 

    People tend to shy away from mixing different patterns and textures. It may seem daunting, but this is essential in creating a space to have visual interest. Being too matchy-matchy is incredibly boring and a huge mistake! The easiest ways to add texture and patterns to your home are with throws, pillows, and artwork. I love mixing different types of woods to create a vintage/eclectic look. I put this bold green pillow on a floral patterned chair. I think this works well because both patterns have a floral vibe and the green pillow pulls out the green tones from the chair.  Make sure that all of your patterns, colors, and textures flow with each other. You do not want it to feel too chaotic (see rule #2) unless chaos is what you love (see rule #1).

    Have fun and put these rules to practice! What are rules that you live by when designing your home? Share some of the furniture pieces that you love below!

  • Published on

    Plant envy - a  guide to bringing Nature vibes indoors

    Planting has become a new favorite hobby of mine! Recently, I have realized I currently have NO hobbies... I have been so busy between working two jobs, going to school full-time and working two jobs, or working full-time and going to school full-time over the past 5 years that I lost any free time for hobbies. I have a newfound obsession with plants. A small herb garden is what sparked my interest. I live in a small one-bedroom apartment on the lower east side of Milwaukee. Meaning I have no yard and this was the next best thing to gardening. 
     
    There are so many positive aspects to bringing real plants into your home. Plants generate a Zen-like atmosphere. They add beauty and life to a home. Anyone who enjoys the outdoors, knows how relaxing and refreshing it can be. There is something about nature that makes you feel good! Aside from aesthetics, houseplants are known to be beneficial to your health. By removing toxins and purifying the air in your home and creating feel-good vibes, its a win-win! 
     
    There are a vast amount of plants out there and deciding what ones are best for your home can seem like a daunting task. I am a person that is rarely home so finding houseplants that are low-maintenance was the main goal. Planting does not have to be so hard, especially if you're a newb like me.
     
    Here are a few of my favorite Houseplants:

    • String of Pearls -- This was my most recent purchase and I am OBSESSED! I love love love the gorgeous strands of beads. String of Pearls is a succulent that is fairly easy to grow. It grows best in areas with access to bright sunlight. Succulents like their roots to be soaked in water, but then they dry out quickly. You only need to water the String of Pears when the soil is bone dry (approx. 1-2x per week). I placed this one on a shelf above my bed, which is right next to my window. The String of Pearls creates a unique focal point in any space. The way the beads spill over baskets and drape over shelves create a truly dramatic look!
    Snake Plant (Sansevieria)-- The Snake plant was one of my first real plants. This plant is perfect for newbies or people that lead busy lives. It is so low maintenance and it doesn't take a green thumb to keep these plants alive. Snake plants are not picky. It prefers bright light to full sun, but can tolerate low light. You only need to water this one when the soil is bone dry. It grows best in a pot with drainage and cactus/succulent soil.

    ​TIP: Try to not get water on the leaves. If the plant starts to turn yellow or get soft/mushy, then you have over-watered. 


    Jade Plant -- This plant is another great low maintenance indoor houseplant. Jade plants do not like to be overwatered! They only need to be watered when the soil is completely dry. These plants enjoy a lot of sunlight. Without sunlight they tend to get leggy. When they get the desired amount of sunlight, they stems start to get woody. The plant will start to turn red, which adds a nice contrast. Jade plants are great for bathrooms. They add a refreshing feel to any master bath.
     
    All three of these houseplants are great for beginners and are a good starting point for bringing fresh vibes to your space! There are so many houseplants that I cannot wait to add to my collection! Next on the list are Aloe, a funky cacti, and some hanging Ivy. What are some of your favorite houseplants and growing tips?