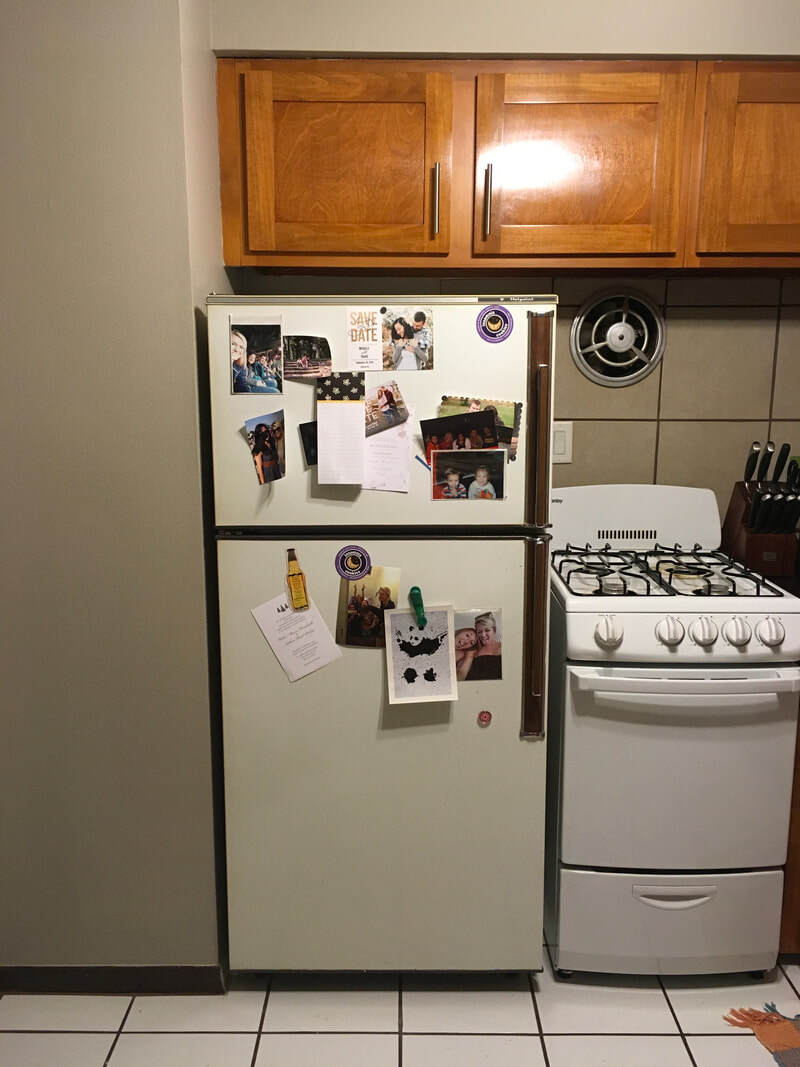
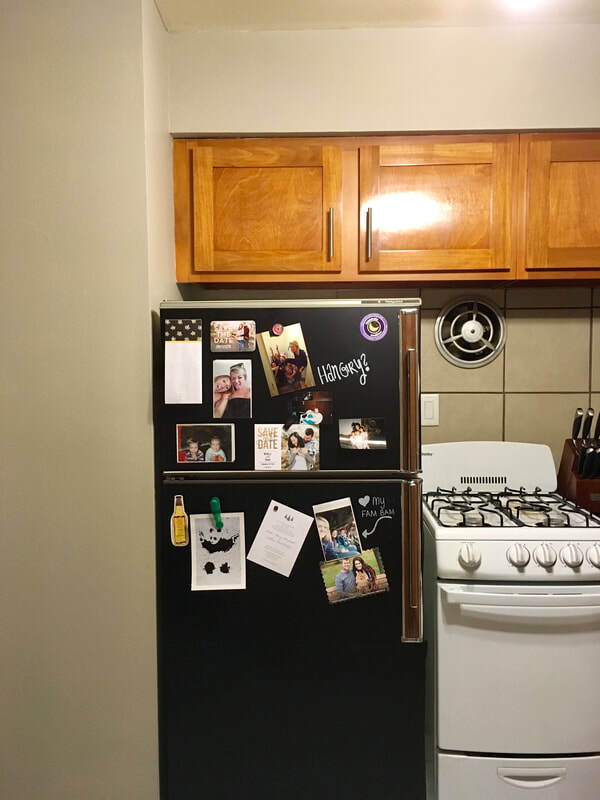
• Published on

    DIY Chalkboard Refrigerator

    before

    AFTER

    You guys... this was the easiest and cheapest kitchen upgrade I have seen! And look how gorgeous it looks!! It took less than 30 minutes and $25. My fridge has been an eyesore in my apartment. Since I rent, I don't have a choice but to keep it. I was thinking about ways I can make my kitchen look nicer and this popped into my head. This is the perfect DIY for a renter! It is no mess, no hassle and it is easy to remove when it is time to move out. 

    All you need is peel and stick chalkboard vinyl. I purchased (2) rolls off of amazon. It even came with a chalkboard marker. 

    First - Clear off all items from your fridge. Then clean with soap and water. Make sure to dry completely. 
    Next - Cut vinyl pieces to size. Peel off the back and stick onto the fridge. I laid the vinyl horizontally on the fridge, sticking from left to right. The hardest part was working around the refrigerator handle. I used a utility knife to get the perfect cut around the handle.

    For this project, I used just over 1 roll. You could probably get away with one roll if you have a small fridge. I was being generous with my cuts in the beginning so ran out by the bottom of the fridge. 

    Last - Let your creative side loose! Add some fun sayings, your own artwork, weekly tasks, or a grocery list :)

    Thats it! sooo simple and it seriously changed the look of my entire kitchen (for the better). I am in love with this easy DIY!


  • Published on

    Styling a coffee table

    ​Creating the perfectly styled coffee table is actually quite simple. No matter what your style, aesthetic, or vibe is these tips are sure to help you flaunt it in the best way possible!
    Anchor
    I am a major fan of designing with trays. Having a bunch of trinkets can seem messy and cluttered. Setting those items on tray anchors the objects to that place. Trays help to make the pieces on your coffee table feel purposeful.

    Create Varying Heights
    Layering and using different height objects creates interest. You can layer books and place objects on top of coasters. Do not use all objects that are the same height (unless you plan on layering them). Varying height and width pieces are key. Make sure to not use too tall of objects as it may interfere with your view of the TV.


    Add Intriguing Items
    This is where your own personal style comes into play! Be sure to add objects that are personal to you and show off those things that you love. GET CREATIVE!

    Go Green
    Adding a plant to your decor instantly brings life to your coffee table. Your choices here are pretty limitless. Houseplants are a great for adding color and something organic. I am newer to the plant mom club so I prefer succulents as they are easy to care for.

    Bring Some Ambiance to the Table
    Last but not least, one easy trick to creating the perfect coffee table is to add a candle. This adds ambiance when you are relaxing on the couch or entertaining guests. It can also serve as a decorative object if the candle comes in a unique container.


  • Published on

    How to: reclaimed barn wood shelves

    Barn wood shelves are a fun way to add some character to your walls and create a place for storage. These shelves were fairly easy to make (Mostly thanks to my dad for doing all of the manual labor)
    • Gather barn wood. My parents live in an 150 year old farm house with the original barn still on the lot. They have tons of barn wood for me to use. If you do not have access to a barn, check out your local salvage shops. Here in Milwaukee we have the Habitat for Humanity Restore or WasteCap. These are great resources to find old original barn wood. 
    • Cut the barn wood to the desired length. These boards are 6"D and were cut to be 22"W.
    • Clean and Finish wood. It is a good idea to clean the wood so that you do not bring any dirt or bugs inside your home. I cleaned the boards with soap, water, and a bristle brush. Let dry. After wood is dry, seal the wood with Minwax Polycrilic Clear Spray. This is a super quick drying clear spray that makes it convenient and easy to use while keeping the look of the original barn wood intact. I found this on Amazon.
    • Next step is to make the brackets. If you do not have the tools to bend and cut metal, it is much easier to buy L brackets. Here I bought strips of cold-rolled steel and had my dad cut the strips, bent them to the desired size, and drill holes (for mounting).
    • Rust brackets. This step is personal preference. I wanted the brackets to have a rustic look. I took muriatic acid and painted it onto the brackets. Be careful with the acid not to get it on yourself or anything else. I set this in a bucket and let sit outside overnight.
    • Hang brackets on wall. I measured from the ceiling down and made sure the brackets were level and all lined up. Typically I would use screws to hold these shelves up, however, I live in a rental and did not want to put a ton of holes in my bathroom wall. Instead I used Command strips to hold the brackets. These are a renters miracle! They are easy to use, are reliable and easy to remove. Command strips can hold up to 10lb each so you have to make sure that you do not exceed this weight. Be sure to consider the weight of the brackets and the shelves if you go this route.

    • Set shelves on brackets. 
    Picture
    • Decorate the shelves with your favorite items!